728x90
1. 게시글 삭제
1) posts-update.mustache 화면 수정
경로 >> src/main/resources/templates/posts-update.mustache
{{>layout/header}}

<h1>게시글 수정</h1>

<div class="col-md-12">
    <div class="col-md-4">
        <form>
            <div class="form-group">
                <label for="id">글 번호</label>
                <input type="text" class="form-control" id="id" value="{{post.id}}" readonly>
            </div>

            <div class="form-group">
                <label for="title">제목</label>
                <input type="text" class="form-control" id="title" value="{{post.title}}" >
            </div>

            <div class="form-group">
                <label for="author">작성자</label>
                <input type="text" class="form-control" id="author" value="{{post.author}}" readonly>
            </div>

            <div class="form-group">
                <label for="content">내용</label>
                <textarea class="form-control" id="content"> {{post.content}}</textarea>
            </div>
        </form>

        <a href="/" role="button" class="btn btn-secondary">취소</a>

        <button type="button" class="btn btn-primary" id="btn-update">수정 완료</button>

		<!-- 추가 -->
        <button type="button" class="btn btn-danger" id="btn-delete">삭제</button>
    </div>
</div>

{{>layout/footer}}
2) Index.js - 삭제 기능 추가
경로 >> src/main/resources/static/js/app/index.js
var main = {
        init : function () {
            var _this = this;
            // 생성
            $('#btn-save').on('click', function () {
                _this.save();
                });

            // 수정
            $('#btn-update').on('click', function () {
                _this.update();
            });

            // 삭제
            $('#btn-delete').on('click', function () {
                _this.delete();
            });
        },

        save : function () {
            var data = {
                title: $('#title').val(),
                author: $('#author').val(),
                content: $('#content').val()
            };

            $.ajax({
                type: 'POST',
                url: '/api/v1/posts',
                dataType: 'json',
                contentType: 'application/json; charset=utf-8',
                data: JSON.stringify(data)
            }).done(function() {
                alert('글이 등록되었습니다.');
                window.location.href = '/';     // 글 등록 성곡시 메인페이지(/)로 이동
                }).fail(function (error) {
                alert(JSON.stringify(error));
            });
        },

        update : function () {
            var data = {
                title: $('#title').val(),
                content: $('#content').val()
            };

            var id = $('#id').val();

            $.ajax({
                type: 'PUT',
                url: '/api/v1/posts/' + id,
                dataType: 'json',
                contentType: 'application/json; charset=utf-8',
                data: JSON.stringify(data)
            }).done(function () {
                alert('글이 수정되었습니다.');
                window.location.href = '/';
            }).fail(function (error) {
                alert(JSON.stringify(error));
            });
        },

        delete : function () {
            var id = $('#id').val();

            $.ajax ({
                type: 'DELETE',
                url: '/api/v1/posts/' + id,
                dataType: 'json',
                contentType: 'application/json; charset=utf-8'
            }).done(function() {
                alert('글이 삭제되었습니다.');
                window.location.href = '/';
            }).fail(function (error) {
                alert(JSON.stringify(error));
            });
        }
};

main.init();
3) PostsService
경로 >> src/main/java/com/project/spring/springboot/service/posts/PostsService
import com.project.spring.springboot.domain.posts.Posts;
import com.project.spring.springboot.domain.posts.PostsRepository;
import com.project.spring.springboot.web.dto.PostsListResponseDto;
import com.project.spring.springboot.web.dto.PostsResponseDto;
import com.project.spring.springboot.web.dto.PostsSaveRequestDto;
import com.project.spring.springboot.web.dto.PostsUpdateRequestDto;
import lombok.RequiredArgsConstructor;
import org.springframework.stereotype.Service;
import org.springframework.transaction.annotation.Transactional;

import java.util.List;
import java.util.stream.Collectors;

@RequiredArgsConstructor
@Service
public class PostsService {

    private final PostsRepository postsRepository;

    @Transactional
    public Long save(PostsSaveRequestDto requestDto) {
        return postsRepository.save(requestDto.toEntity()).getId();
    }

    @Transactional
    public Long update(Long id, PostsUpdateRequestDto requestDto) {
        Posts posts = postsRepository.findById(id)
                .orElseThrow(() -> new IllegalArgumentException("해당 게시글이 없습니다, id=" + id));

        posts.update(requestDto.getTitle(), requestDto.getContent());
        return id;
    }

    public PostsResponseDto findById(Long id) {
        Posts entity = postsRepository.findById(id)
                .orElseThrow(() -> new IllegalArgumentException("해당 게시글이 없습니다. id=" + id));

        return new PostsResponseDto(entity);
    }

    @Transactional(readOnly = true)
    public List<PostsListResponseDto> findAllDesc() {
        return postsRepository.findAllDesc().stream().map(PostsListResponseDto::new).collect(Collectors.toList());
    }

	// 추가
    @Transactional
    public void delete(Long id) {
        Posts posts = postsRepository.findById(id)
                .orElseThrow(() -> new IllegalArgumentException("해당 게시글이 없습니다. id=" + id));

        postsRepository.delete(posts);
    }
}
- postsRepository.delete(posts)
: JpaRepository에서 이미 delete 메소드를 지원하고 있으니 이를 활용
- 엔티티를 파라미터로 삭제할 수도 있고, deleteById 메소드를 이용하면 id로 삭제할수도 있습니다.
- 존재하는 Posts인지 확인을 위해 엔티티 조회 후 그대로 삭제합니다.
4) PostsApiController
경로 >> src/main/java/com/project/spring/springboot/web/PostsApiController
package com.project.spring.springboot.web;

import com.project.spring.springboot.service.posts.PostsService;
import com.project.spring.springboot.web.dto.PostsResponseDto;
import com.project.spring.springboot.web.dto.PostsSaveRequestDto;
import com.project.spring.springboot.web.dto.PostsUpdateRequestDto;
import lombok.RequiredArgsConstructor;
import org.springframework.web.bind.annotation.DeleteMapping;
import org.springframework.web.bind.annotation.GetMapping;
import org.springframework.web.bind.annotation.PathVariable;
import org.springframework.web.bind.annotation.PostMapping;
import org.springframework.web.bind.annotation.PutMapping;
import org.springframework.web.bind.annotation.RequestBody;
import org.springframework.web.bind.annotation.RestController;

@RequiredArgsConstructor
@RestController
public class PostsApiController {

    private final PostsService postsService;

    @PostMapping("/api/v1/posts")   // 등록
    public Long save(@RequestBody PostsSaveRequestDto requestDto) {
        return postsService.save(requestDto);
    }

    @PutMapping("/api/v1/posts/{id}")   // 수정
    public Long update (@PathVariable Long id, @RequestBody PostsUpdateRequestDto requestDto) {
        return postsService.update(id, requestDto);
    }

    @GetMapping("/api/v1/posts/{id}")   // 조회
    public PostsResponseDto findById (@PathVariable Long id) {
        return postsService.findById(id);
    }

	// 추가
    @DeleteMapping("/api/v1/posts/{id}")  // 삭제
    public Long delete(@PathVariable Long id) {
        postsService.delete(id);
        return id;
    }
}
위와 같이 코드를 작성 후 동작시켜보겠습니다.
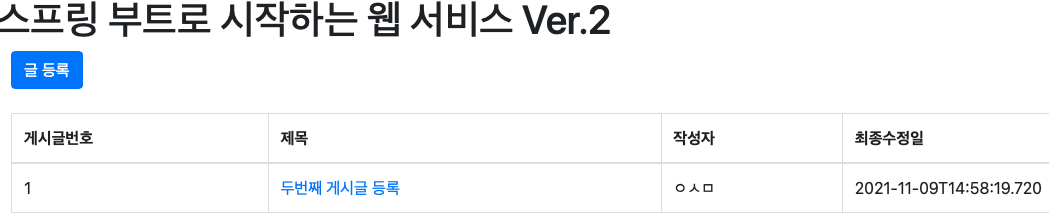


이로써 간단한 CRUD 구현에 성공했습니다.
다음장은 스프링 시큐리티와 OAuth를 활용한 소셜 로그인 기능을 사용해보도록 하겠습니다.
728x90
'Spring > 스프링 부트와 AWS로 혼자 구현하는 웹 서비스' 카테고리의 다른 글
| (IntelliJ) 게시글 수정 화면 만들기 (0) | 2021.11.09 |
|---|---|
| (IntelliJ) 전체 조회 화면 만들기 (0) | 2021.11.09 |
| (IntelliJ) 머스테치로 화면 구성 (0) | 2021.11.09 |
| (IntelliJ) JPA Auditing으로 생성/수정 시간 자동화 (0) | 2021.11.04 |
| (IntelliJ) H2 Console 사용 방법 (0) | 2021.11.02 |
